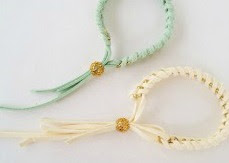
DIY ΒΡΑΧΙΟΛΙ / DIY CHAIN WOVEN BRACELET
6.10.15
(scroll down for English)
Η σημερινή ανάρτηση είναι "δανεισμένη" από την Eileen του Yesmissy.com.
ΥΛΙΚΑ
Αλυσίδα, περίπου 18 εκ.
Κορδόνι σουέτ, περίπου 1,80 μ.
Χάντρα με μεγάλη τρύπα για το κλείσιμο
ΟΔΗΓΙΕΣ
Για το τελείωμα, χρησιμοποιούμε μια χάντρα με μεγάλη τρύπα και περνάμε τα κορδόνια μέσα.
Curb chain, about 18 cm.
Suede lace, about 180 cm.
Bead with large hole, for finishing ends
Δεν είναι λίγες οι φορές που έχω δει ένα κόσμημα και έχω αναρωτηθεί "Γιατί είναι τόσο ακριβό, αφού είναι τόσο απλό που μπορώ να το φτιάξω και εγώ;". Όταν πρόκειται για DIY αυτό που πληρώνουμε τις περισσότερες φορές είναι ο κόπος και ο χρόνος και όχι τόσο τα υλικά.
Με μια απλή αναζήτηση στο Pinterest θα βρείτε εκατοντάδες DIY Tutorials για κοσμήματα και όχι μόνο με πολύ απλές και κατανοητές οδηγίες (τα δικά μου Pins θα τα βρείτε εδώ).
ΥΛΙΚΑ
Αλυσίδα, περίπου 18 εκ.
Κορδόνι σουέτ, περίπου 1,80 μ.
Χάντρα με μεγάλη τρύπα για το κλείσιμο
ΟΔΗΓΙΕΣ
1. Κόβουμε το κορδόνι στην μέση. Παίρνουμε το ένα κομμάτι και κάνουμε έναν απλό κόμπο στην αρχή της αλυσίδας. Αφήνουμε τα δύο άκρα του κορδονιού άνισα, το πρώτο περίπου 30 εκ. και το άλλο 60 εκ.
2. Ευθυγραμμίζουμε το κοντό κομμάτι με την δεξιά μεριά της αλυσίδας. Παίρνουμε το μακρύτερο κομμάτι και το τυλίγουμε από την κορυφή της αλυσίδας μέσα-έξω γύρω από την αλυσίδα και το κοντό κορδόνι.
3. Συνεχίζουμε να τυλίγουμε την αλυσίδα με το κορδόνι σε όλο το μήκος της. Τελειώνουμε κάνοντας έναν κόμπο.
Τώρα για το δεύτερο μέρος, ανάλογα με την φορά που θα πλέξουμε το κορδόνι θα δημιουργήσουμε δύο διαφορετικά σχέδια:
Καταρχήν, γυρίζουμε το βραχιόλι ανάποδα, για να έχουμε πάλι δεξιά την πλευρά που θα "δουλέψουμε". Δένουμε το δεύτερο κομμάτι του κορδονιού με τον ίδιο τρόπο.
1. Για το πλέξιμο σε στυλ chevron, πλέκουμε το κορδόνι ακριβώς απέναντι από το πρώτο. Έτσι εάν το πρώτο κορδόνι το έχουμε πλέξει από μπρος και τα πίσω τότε το δεύτερο θα το πλέξουμε από πίσω προς τα μπρος.
2. Για διαγώνιο πλέξιμο, πλέκουμε το κορδόνι ακριβώς με την ίδια φορά που πλέξαμε και το πρώτο.
Δείτε τις φωτογραφίες για να καταλάβετε.
Για το τελείωμα, χρησιμοποιούμε μια χάντρα με μεγάλη τρύπα και περνάμε τα κορδόνια μέσα.
There are some times that I see a piece of DIY jewelry on a store and wonder "Why is it so expensive, it is so simple that I can make one myself?" When you buying a DIY piece of anything most of the times the price isn't about the materials used but for the time and effort of its creator.
Nowadays with Pinterest, you can find thousands of DIY jewelry tutorials (you can find my Pins here).
Suede lace, about 180 cm.
Bead with large hole, for finishing ends
INSTRUCTIONS
1. Cut the suede lace in half. Take 1 strand of the lace and loop it through the top of the chain. Tie a regular knot leaving the ends uneven, with one strand approximately 30 cm. on side and the other with the remaining 60 cm.
2. Line up the shorter piece suede lace to the right side of the chain bracelet. Now take the longer strand and thread through the top link from front to back and wrap it around the chain and other piece of suede on the right side. Then, thread the rope through each link, including a piece of the shorter piece of suede lace.
3. Keep threading and wrapping down the length of the chain bracelet. When you come to the end knot off the ends.
Now for the 2nd half of the bracelet, by changing the direction of the way we’re threading the suede lace, you can create 2 unique patterns.
To begin with, turn your bracelet upside down, so the side you’ll be working on will be the right side again. Tie the second strand of suede lace the same way you tied the first piece in the beginning.
1. Create a chevron style pattern by weaving the lace in a mirror like image from the way you did on the first side. So if on the first half of your bracelet you threaded the suede lace threading from front to back. This time you’ll want to thread the suede rope from back to front.
2. Create a diagonal stitch pattern by weaving the suede exactly in the same direction as you did on the first side.
Check the photo below.
To finish it off, simply use a large hole bead and gather all the strands through it, to make an adjustable sliding closure.
Happy Crafting!


0 σχόλια