(scroll down for English)

Γλυκά/Desserts
ΓΡΗΓΟΡΑ ΜΗΛΟΠΙΤΑΚΙΑ ΜΕ ΑΛΜΥΡΗ ΚΑΡΑΜΕΛΑ // QUICK & EASY MINI SALTED CARAMEL APPLE PIES
12.10.17


Η μηλόπιτα είναι ανάμεσα στα 3 αγαπημένα μου γλυκά. Το απόλυτο συνοδευτικό του απογευματινού μου καφέ. Έχω ψάξει πολύ και έχω πειραματιστεί ακόμη πιο πολύ αναζητώντας την ιδανική συνταγή για μηλόπιτα πριν καταλήξω σ' αυτήν. Πραγματικά πρόκειται για την πιο εύκολη συνταγή μηλόπιτας και το crumb είναι απίθανο.
Συνιστάται αυστηρά να την γαρνίρετε με σιρόπι αλμυρής καραμέλας και παγωτό βανίλια ή καϊμάκι! Πραγματικά θεϊκή!

ΕΥΚΟΛΗ ΜΗΛΟΠΙΤΑ
8 άτομα
Προετοιμασία: 30 λεπτά - Ψήσιμο: 45 λεπτά
ΥΛΙΚΑ
(για μια ταρτιέρα 28 εκ.)
1 φύλλο ζύμη για τάρτες ή κουρού
4 μέτρια μήλα, σε μικρά κομμάτια
1 κ.σ. κανέλα
1 φλ. καστανή ζάχαρη
2 κ.σ. αλεύρι
1 κ.γλ. μοσχοκάρυδο
Για την κρούστα
1/2 φλ. αλεύρι
1/2 φλ. βούτυρο, μαλακωμένο
1/2 φλ. ζάχαρη
ΕΚΤΕΛΕΣΗ
Βουτυρώστε μια ταρτιέρα διαμέτρου 28 εκ. και απλώστε τη ζύμη, φροντίζοντας να καλύψετε και τα τοιχώματα. Σε ένα μπολ, ανακατέψτε τη ζάχαρη, το αλεύρι, το μοσχοκάρυδο και και την κανέλα. Προσθέστε τα μήλα και ανακατέψτε απαλά να καλυφθούν από το μείγμα.

Αφήστε το στην άκρη για 10 λεπτά, ώστε να βγάλει τα υγρά του το μείγμα και στη συνέχεια απλώστε το πάνω στη ζύμη.

Για την κρούστα, σε ένα μπολ ανακατέψτε το αλεύρι, το βούτυρο και τη ζάχαρη και ζυμώστε με το χέρι σας, ώστε να μοιάζει με ψίχουλα.

Ρίξτε το πάνω στην μηλόπιτα (φροντίστε να την ψήσετε αμέσως, για να μην μαλακώσει πολύ το βούτυρο). Ψήστε τους 200oC για 45 λεπτά, μέχρι να πάρει ένα χρυσαφί χρώμα. Αποσύρετε από το φούρνο και αφήστε στην άκρη να κρυώσει. Σερβίρετε ζεστή με παγωτό βανίλια και σιρόπι καραμέλας.

Συνταγή ελαφρώς πειραγμένη από I Heart Naptime


Για την κρούστα, σε ένα μπολ ανακατέψτε το αλεύρι, το βούτυρο και τη ζάχαρη και ζυμώστε με το χέρι σας, ώστε να μοιάζει με ψίχουλα.

Ρίξτε το πάνω στην μηλόπιτα (φροντίστε να την ψήσετε αμέσως, για να μην μαλακώσει πολύ το βούτυρο). Ψήστε τους 200oC για 45 λεπτά, μέχρι να πάρει ένα χρυσαφί χρώμα. Αποσύρετε από το φούρνο και αφήστε στην άκρη να κρυώσει. Σερβίρετε ζεστή με παγωτό βανίλια και σιρόπι καραμέλας.

Συνταγή ελαφρώς πειραγμένη από I Heart Naptime

Apple pie has been in my top 3 favorite desserts. I've done a lot of research and experienced with a bunch of different apple pie recipes before ending to this one. It's the easiest apple pie recipe you've ever need and the crumb topping is simply amazing. I highly recommend to serve it with some salted caramel and ice cream on top. Seriously divine!

EASY APPLE PIE
8 servings
Preparation: 30 minutes - Baking: 45 minutes
INGREDIENTS
(for a 28 cm. pie dish)
1 refrigerated pie crust
4 medium sized apples, cubed
1 tbsp cinnamon
1 cup brown sugar
2 tbsp flour
1 tsp nutmeg
For the topping
1/2 cup flour
1/2 cup butter, softened
1/2 cup sugar
DIRECTIONS
Butter a 28 cm pie dish and press the pie crust, covering the sides. In a bowl, combine sugar, flour, nutmeg and cinnamon. Toss lightly with sliced apples.

Let sit 10 minutes for sugar mixture to melt onto the apples and then pour into the unbaked pie crust.

For the topping, combine flour, butter and sugar. Mix together with fingers until crumbly and sprinkle over pie (you'll need to bake soon before the butter mixture softens too much).

Bake at 200oC for 45 minutes until golden brown. Serve warm with vanilla ice cream and caramel on top.
Recipe adapted from I Heart Naptime
Happy Baking!


photo: Pinterest
(scroll down for English)
Δεδομένου ότι οι Γιορτές πλησιάζουν με γοργό ρυθμό σίγουρα θα αρχίσετε (εάν δεν το έχετε κάνει ήδη) την προετοιμασία των γλυκών σας. Πριν ξεκινήσουμε λοιπόν, σκέφτηκα να συγκεντρώσω όλα τα tips και τις συμβουλές σε μια ανάρτηση προκειμένου να σας διευκολύνω. Ας αρχίσουμε λοιπόν!

photo: Pinterest
1| Καλύψτε τα ταψιά σας με αντικολλητικό χαρτί. Κάνει ευκολότερη τη μεταφορά από το ταψί και μπορεί να χρησιμοποιηθεί πολλές φορές. Επίσης γλιτώνετε το καθάρισμα των ταψιών!
2| Μην χρησιμοποιείτε τα δοχεία μέτρησης για σέσουλες καθώς με την χρήση θα μαζέψουν αλεύρι και δεν θα είναι σωστή η μέτρησή σας. Χρησιμοποιείστε ένα κουτάλι για να γεμίσετε το δοχείο μέτρησης και μετά με ένα μαχαίρι ισιώστε την επιφάνεια.
3| Μπορεί πολλοί να αποφεύγουν το αλάτι αλλά όταν πρόκειται για τις γλυκιές δημιουργίες μας, χρησιμοποιείτε όσο αναγράφει η συνταγή, ειδικά εάν γίνεται λόγος για ανάλατο βούτυρο. Στην περίπτωση που χρησιμοποιείτε αλατισμένο βούτυρο, βάλτε τη μισή ποσότητα που αναγράφει η συνταγή. Το αλάτι αναδεικνύει τις γεύσεις σε μια συνταγή.
4| Ακολουθείστε κατά γράμμα τη συνταγή και μην παραβλέπετε μικρές λεπτομέρειες καθώς είναι σημαντικές για το αποτέλεσμα. Το κοσκίνισμα π.χ. του αλευριού παίζει μεγάλο ρόλο στην υφή του τελικού προϊόντος.
5| Χρησιμοποιώντας τα βαριά, "λευκά", μεταλλικά ταψιά, έχετε λιγότερες πιθανότητες να παραψήσετε τα κουλουράκια σας διότι αντανακλούν την θερμότητα σε αντίθεση με τα σκούρα ταψιά τα οποία την απορροφούν.
6| Μην αλλάζετε τους τύπους του αλευριού. Μαλακό, σκληρό ή αλεύρι φαρίνα δεν είναι το ίδιο με αυτό για όλες τις χρήσεις.
7| Όταν αγοράζετε τα υλικά για τα γιορτινά σας γλυκά, προσπαθήστε αυτά να είναι καλής ποιότητας. Είναι γιορτές!
8| Χρησιμοποιήστε αληθινή ζάχαρη για τα γλυκά σας και όχι υποκατάστατα!
9| Το πιο δύσκολο κομμάτι των μπισκότων είναι το ψήσιμο. Παρακολουθήστε τα προσεκτικά και προσπαθήστε να αντισταθείτε στους περισπασμούς.
10| Για μια όμορφη ποικιλία με κουλουράκια, χρησιμοποιήστε πιατέλες όχι μεγαλύτερες από 30 εκ. Δείχνουν πιο εντυπωσιακές.
Διαβάστε επίσης

Αναζητάτε συνταγές;
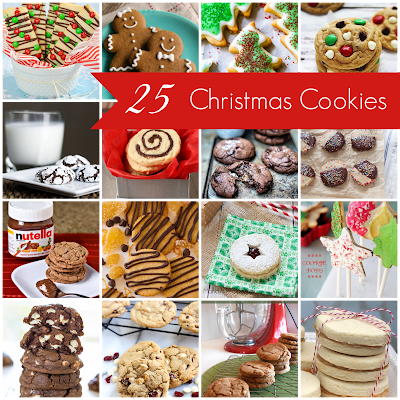

Since the holidays are right around the corner, I know you’ll want to begin making Christmas cookies ahead of time. Before we all do that, I thought for today's post to round up some cookie tips so as to make your task easier. Let’s get started!
photo: Pinterest
1| Line your baking pan with parchment paper. The cookies brown nicely and you can transfer the cookies easily and reuse the cookie sheets. And there’s less cleanup!
2| Don’t use the measuring cup as a scoop or it’ll pack the flour and you’ll end up with more flour in the cup than intended. Spoon flour into the measuring cup and then run a knife over the top to level the flour.
3| Use the full amount of salt called for in a recipe, especially if you are using unsalted butter. If you use salted butter, use 1/2 the amount of salt called for in the recipe. Don’t skip salt, as salt brings out flavors in a recipe.
4| Don’t overlook the importance of specific mixing instructions. Small variations in a recipe can make a big difference how the cookies turns out in the end. Sifting flour can make a difference in the texture when it’s finished.
5| Shiny heavyweight baking sheets that reflect heat are less likely to produce overbaked cookie bottoms than dark baking sheets that absorb heat.
6| Don’t substitute flour types. Cake flour, all purpose flour and bread flour are not the same.
7| When purchasing supplies for your holiday cookie baking, try to use the finest ingredients. It’s the holidays!
8| Use real cane sugar. That's all!
9| The only tricky part of making cookies is baking them properly. And that’s simply a matter of watching them carefully, especially as they near the end of their baking time. Resist any temptation to answer the telephone or leave the kitchen.
10| For arranging assortments of cookies, use platters that are 30 cm. diametr or smaller. Small platters of cookies look more inviting.
Read Also
Looking for some recipes?


Τραγανός, υπέροχα σιροπιαστός και καρυδάτος. Αυτός είναι ο ιδανικός μπακλαβάς! Το παραδοσιακό γλυκό μας το οποίο αν και τελειοποιήθηκε στις κουζίνες του Τοπ Καπί στα χρόνια της Οθωμανικής Αυτοκρατορίας, έχει τις ρίζες του χιλιάδες χρόνια πριν, στην Αρχαία Ελλάδα. Θα τον συναντήσετε σε πολλές παραλλαγές εντός και εκτός ελληνικών συνόρων. Στην Κεντρική Ελλάδα για παράδειγμα τον φτιάχνουν είτε μόνο με αμύγδαλα είτε με καρύδια και αμύγδαλα ενώ στη γειτονική Τουρκία θα τον βρείτε με φιστίκια και σερβιρισμένο με καϊμάκι.
Ο μπακλαβάς είναι ο πρωταγωνιστής της κατηγορίας "Γλυκά Ταψιού/Σιροπιαστά" και ίσως το μοναδικό γλυκό που δίνει την ευκαιρία σε όλες τις γυναίκες της οικογένειας να συναντηθούν και να το προετοιμάσουν. Θυμάμαι, παλαιότερα περίπου τέτοιες ημέρες, πριν αρχίσουν οι κάθε είδους απώλειες, μαζεύονταν στην κουζίνα μας θείες και φίλες για να φτιάξουν τον μπακλαβά για τις γιορτές και όσο αυτός ψήνονταν, να πιουν το καφεδάκι τους και να ανταλλάξουν τα νέα τους. Αυτή η συνταγή λοιπόν είναι μια από τις οικογενειακές μας!
Πρόκειται για ένα απλό και εύκολο γλυκό, η παρασκευή του οποίου δεν θα πρέπει να σας τρομάζει. Η διαδικασία είναι ουσιαστικά πολύ απλή: λάδωμα-φύλλο-γέμιση-φυλλο κ.ο.κ. Δοκιμάστε το λοιπόν!

ΜΠΑΚΛΑΒΑΣ
12 άτομα
Προετοιμασία: 1 ώρα - Ψήσιμο: 2 έως 2 1/2 ώρες
ΥΛΙΚΑ
500 γρ. φύλλα κρούστας
400 γρ. βούτυρο, λιωμένο
1 κ.σ. γεμάτη, κανέλα τριμμένη
1 κ.γ. κοφτό, γαρύφαλλο τριμμένο
400 γρ. καρύδια (ή 200 γρ. καρύδια και 200 γρ. αμύγδαλα)
50 γρ. τριμμένη φρυγανιά
400 γρ. βούτυρο, λιωμένο
1 κ.σ. γεμάτη, κανέλα τριμμένη
1 κ.γ. κοφτό, γαρύφαλλο τριμμένο
400 γρ. καρύδια (ή 200 γρ. καρύδια και 200 γρ. αμύγδαλα)
50 γρ. τριμμένη φρυγανιά
Για το σιρόπι
600 γρ. ζάχαρη
400 ml νερό
60 γρ. γλυκόζη
1 ξύλο κανέλας
3 ολόκληρα γαρύφαλλα
1 πορτοκάλι κομμένο στη μέση
ΕΚΤΕΛΕΣΗ
Ετοιμάζουμε
πρώτα το σιρόπι. Σε μία κατσαρόλα σε δυνατή φωτιά, βάζουμε τη ζάχαρη,
το νερό, τη γλυκόζη, 1 ξύλο κανέλας, τα γαρύφαλλα και το κομμένο
πορτοκάλι. Μόλις πάρει μία βράση, λιώσει η ζάχαρη και γίνει το σιρόπι
διαφανές, αποσύρουμε από τη φωτιά και το αφήνουμε να κρυώσει.
Στη συνέχεια ετοιμάζουμε τη γέμιση. Βάζουμε στο μούλτι σε δόσεις τα καρύδια, την κανέλα, τη φρυγανιά και το γαρύφαλλο και τα ψιλοκόβουμε χωρίς όμως να τα κάνουμε σκόνη. Ρίχνουμε το μείγμα σε ένα μπολ και ανακατεύουμε με ένα κουτάλι.

Προθερμαίνουμε το φούρνο στους 150οC. Με ένα πινέλο βουτυρώνουμε πολύ καλά ένα ταψί 35x25 εκ. περίπου και το τοποθετούμε με τη μεγάλη του πλευρά παράλληλη προς το μέρος μας. Ξεκινάμε να απλώνουμε τα φύλλα, φτιάχνοντας τη βάση. Απλώνουμε προσεχτικά το πρώτο φύλλο κρούστας, με τη μεγάλη του πλευρά, να καλύπτει τα 2/3 της επιφάνειας του ταψιού και αφήνουμε τις άκρες του φύλλου να προεξέχουν από τις πλευρές του ταψιού. Πιέζουμε με το χέρι μας ελαφρά ώστε να στρώσει καλά το φύλλο στις γωνίες του ταψιού.
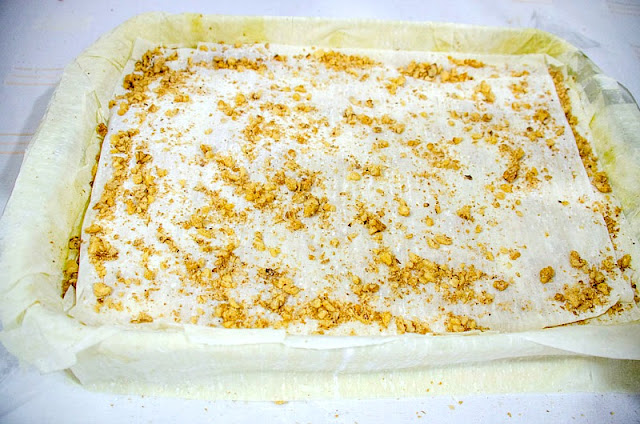
Επαναλαμβάνουμε τη διαδικασία με το δεύτερο
φύλλο, αλλά αυτή τη φορά το στρώνουμε από την άλλη πλευρά του ταψιού και
να επικαλύπτει ελαφρά το πρώτο φύλλο (σταυρωτά). Ραντίζουμε τα φύλλα, ΧΩΡΙΣ να ακουμπάει το πινέλο το φύλλο,
με λιωμένο βούτυρο. Έπειτα, απλώνουμε το τρίτο φύλλο κατά μήκος όλης
της επιφάνειας του ταψιού, στρώνοντας πάλι το φύλλο στις γωνίες όπως και
προηγουμένως. Βουτυρώνουμε με τον ίδιο τρόπο. Απλώνουμε 1 χούφτα από τη
γέμιση σε όλη την επιφάνεια του ταψιού. Απλώνουμε ένα φύλλο ακόμα,
βάζοντας τη μικρή του πλευρά να εφάπτεται στην πάνω μεγάλη πλευρά του
ταψιού. Βουτυρώνουμε με τον ίδιο τρόπο. Απλώνουμε 1 χούφτα γέμιση σε όλη
την επιφάνεια του ταψιού. Απλώνουμε ένα φύλλο ακόμα και βουτυρώνουμε
και προσθέτουμε γέμιση με την ίδια διαδικασία.
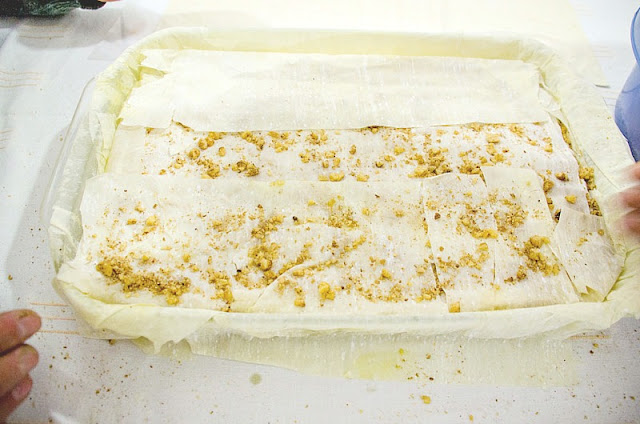
Επαναλαμβάνουμε τη
διαδικασία γέμιση, φύλλο, βούτυρο διαδοχικά, για τα υπόλοιπα φύλλα
αφήνοντας 3 για το τέλος, φροντίζοντας να χρησιμοποιήσουμε όλη η γέμιση.
Γυρνάμε τις άκρες των φύλλων προς τα μέσα και πατάμε καλά. Στη
συνέχεια, βάζουμε ακόμα 2 φύλλα, χωρίς γέμιση, βουτυρώνοντας το κάθε ένα
όπως πριν. Βάζουμε το τελευταίο φύλλο και περιμετρικά πατάμε και
γυρνάμε τις άκρες προς τα μέσα με τη βοήθεια του πινέλου. Ρίχνουμε από
πάνω το υπόλοιπο βούτυρο που μας έχει περισσέψει.

Βάζουμε στο ψυγείο για 10-15 λεπτά να κρυώσει το βούτυρο ώστε να μπορέσουμε να χαράξουμε τον μπακλαβά μας. Χαράζουμε το μπακλαβά με ένα κοφτερό μαχαίρι αλλά όχι μέχρι κάτω. Ψήνουμε σε προθερμασμένο φούρνο 2 έως 2,5 ώρες μέχρι να γίνει τραγανός.

Όταν ψηθεί ο μπακλαβάς, όσο είναι ακόμα καυτός το σιροπιάζουμε με το κρύο σιρόπι. Αφήνουμε να κρυώσει και να τραβήξει το σιρόπι (ιδανικά όλο το βράδυ). Αφού κρυώσει εντελώς, κόβουμε και σερβίρουμε.
Στη συνέχεια ετοιμάζουμε τη γέμιση. Βάζουμε στο μούλτι σε δόσεις τα καρύδια, την κανέλα, τη φρυγανιά και το γαρύφαλλο και τα ψιλοκόβουμε χωρίς όμως να τα κάνουμε σκόνη. Ρίχνουμε το μείγμα σε ένα μπολ και ανακατεύουμε με ένα κουτάλι.

Προθερμαίνουμε το φούρνο στους 150οC. Με ένα πινέλο βουτυρώνουμε πολύ καλά ένα ταψί 35x25 εκ. περίπου και το τοποθετούμε με τη μεγάλη του πλευρά παράλληλη προς το μέρος μας. Ξεκινάμε να απλώνουμε τα φύλλα, φτιάχνοντας τη βάση. Απλώνουμε προσεχτικά το πρώτο φύλλο κρούστας, με τη μεγάλη του πλευρά, να καλύπτει τα 2/3 της επιφάνειας του ταψιού και αφήνουμε τις άκρες του φύλλου να προεξέχουν από τις πλευρές του ταψιού. Πιέζουμε με το χέρι μας ελαφρά ώστε να στρώσει καλά το φύλλο στις γωνίες του ταψιού.


Βάζουμε στο ψυγείο για 10-15 λεπτά να κρυώσει το βούτυρο ώστε να μπορέσουμε να χαράξουμε τον μπακλαβά μας. Χαράζουμε το μπακλαβά με ένα κοφτερό μαχαίρι αλλά όχι μέχρι κάτω. Ψήνουμε σε προθερμασμένο φούρνο 2 έως 2,5 ώρες μέχρι να γίνει τραγανός.

Όταν ψηθεί ο μπακλαβάς, όσο είναι ακόμα καυτός το σιροπιάζουμε με το κρύο σιρόπι. Αφήνουμε να κρυώσει και να τραβήξει το σιρόπι (ιδανικά όλο το βράδυ). Αφού κρυώσει εντελώς, κόβουμε και σερβίρουμε.

Crispy, nutty and extra syrupy! Baklava is a delicious traditional dessert made of layers of crispy golden brown phyllo, filled with
chopped nuts and garnished with scented syrup … Just heaven! It is characteristic of the cuisines of the former Ottoman Empire, and is also found in Central and West Asia. There are many baklava variations. In Turkey, baklava is made with pistachios and served with kaymak (a creamy dairy product - similar to the English clotted cream - made from buffalos milk). In Greece we make baklava using walnuts or almonds, cloves and cinnamon. Although the history of baklava is not well documented, there is evidence that its current form was developed in the imperial kitchens of the Topkapı Palace in Istanbul but has its roots in ancient Greece, where they made the ‘gastrin’, a sweet very similar to the current baklava.
In Greek cuisine there is a very popular dessert category called "Siropiasta" (syrup desserts) which consists from extra syrupy cakes like portokalopita (orange syrup pie) and karidopita (walnut syrup pie) to kataifi, galaktoboureko (syrup custard pie)
and of course the famous traditional Greek baklava. The one thing
all these Greek desserts have in common is of course the scented syrup, which makes each one just irresistible!
Back in the days, around this time of the year, all the women of the family along with some friends were gathered in our tiny kitchen to make baklava for the upcoming holidays and catch up while baklava was in the oven. So this recipe - although it's a classic one - comes from my mom's cookbook.
This is a very easy to follow recipe to make the perfect homemade Baklava the traditional Greek way from scratch with little to no effort! It's the ultimate crowd pleaser dessert for your holiday table. So go ahead, give it a try and amaze everyone with your pastry skills!

BAKLAVA
12 servings
Preparation: 1 hour - Baking: 2 - 2 1/2 hours
INGREDIENTS
500 gr. phyllo dough
400 gr. butter, melted
1 tbsp ground cinnamon
1 tsp ground cloves
400 gr. walnuts (or 200 gr. walnuts and 200 gr. almonds)
50 gr. breadcrumbs
For the syrup
600 gr. granulated sugar
400 ml water
60 gr. corn syrup
1 cinnamon stick
3 whole cloves
1 orange cut in half
DIRECTIONS
We start with the syrup. Place a pot over high heat and add the sugar, water, corn syrup, cinnamon stick, cloves and orange. Bring the mixture to a boil and stir. As soon as the sugar melts, remove from heat and set aside to cool completely. It must be cool when poured over the hot baklava (make sure to discard orange halves before using). To make the filling, beat the walnuts, breadcrumbs, ground cinnamon and ground cloves in a food processor, until they are broken down but not finely grind. Transfer filling to a bowl.

Preheat oven to 150oC. Generously grease a 35x25 cm baking pan with butter. Position it in front of you so that the long side is directly in front of you. Begin spreading the phyllo dough in to the pan to create the bottom crust. Carefully spread the first sheet of phyllo dough in to the pan, making sure it covers 2/3 of the pan and letting the long ends hang over the edges of the pan. Gently press down on the phyllo with your hands to spread it out nicely all the way to the corners of the pan.

Repeat the same process with the second sheet of phyllo dough, only this time start spreading it on the other side of the pan, slightly covering the first sheet. Drizzle the phyllo with butter, DO NOT brush butter directly onto it. This will make the phyllo turn out much crunchier. Spread the third sheet of phyllo dough directly over the first two sheets, making it fit nicely in the pan all the way to the edges.Sprinkle about a handful of filling over them. Spread the fourth sheet of phyllo dough, directly in to the pan, just like the previous one, making sure it is covering the filling. Drizzle with butter. Sprinkle a handful of filling over it. Add another sheet of phyllo dough, placing the two top corners of the phyllo at the top corners of the pan and letting the other end hang over the pan, directly in front of you. Drizzle with butter. Sprinkle a handful of filling over it. Add another sheet of phyllo dough, this time placing the two top corners of the phyllo at the bottom corners of the pan, that are directly in front of you and letting the other end hang over the pan, which is away from you. Drizzle with butter. Sprinkle with another handful of filling over it.

Repeat the same process with all but 3 of the remaining sheets of phyllo dough, which will be used to make the top crust. Make sure you add all of the filling! Fold the overhanging ends of the phyllo over and drizzle with butter. Add 2 of the 3 remaining sheets of phyllo folded in half, to fit nicely and exactly in the pan without any ends hanging over. Drizzle each one with butter. Spread the final sheet nicely over the top, covering the whole pan. Carefully use your brush to tuck it in all around the sides of the baklava, creating a nice top layer. Add all of the remaining butter over the top and you can now brush it over the phyllo dough.

Refrigerate for 20 minutes to chill. When ready, remove and score the top with a sharp knife, creating diamond shaped pieces. Do not score all the way down. Bake for 2-2 ½ hours until golden and super crunchy.

When the baklava is ready, remove from oven and immediately pour the cooled syrup over it. Set it aside to soak up all of the syrup and cool (overnight it will be best). When ready, cut into pieces and serve.

We start with the syrup. Place a pot over high heat and add the sugar, water, corn syrup, cinnamon stick, cloves and orange. Bring the mixture to a boil and stir. As soon as the sugar melts, remove from heat and set aside to cool completely. It must be cool when poured over the hot baklava (make sure to discard orange halves before using). To make the filling, beat the walnuts, breadcrumbs, ground cinnamon and ground cloves in a food processor, until they are broken down but not finely grind. Transfer filling to a bowl.

Preheat oven to 150oC. Generously grease a 35x25 cm baking pan with butter. Position it in front of you so that the long side is directly in front of you. Begin spreading the phyllo dough in to the pan to create the bottom crust. Carefully spread the first sheet of phyllo dough in to the pan, making sure it covers 2/3 of the pan and letting the long ends hang over the edges of the pan. Gently press down on the phyllo with your hands to spread it out nicely all the way to the corners of the pan.

Repeat the same process with the second sheet of phyllo dough, only this time start spreading it on the other side of the pan, slightly covering the first sheet. Drizzle the phyllo with butter, DO NOT brush butter directly onto it. This will make the phyllo turn out much crunchier. Spread the third sheet of phyllo dough directly over the first two sheets, making it fit nicely in the pan all the way to the edges.Sprinkle about a handful of filling over them. Spread the fourth sheet of phyllo dough, directly in to the pan, just like the previous one, making sure it is covering the filling. Drizzle with butter. Sprinkle a handful of filling over it. Add another sheet of phyllo dough, placing the two top corners of the phyllo at the top corners of the pan and letting the other end hang over the pan, directly in front of you. Drizzle with butter. Sprinkle a handful of filling over it. Add another sheet of phyllo dough, this time placing the two top corners of the phyllo at the bottom corners of the pan, that are directly in front of you and letting the other end hang over the pan, which is away from you. Drizzle with butter. Sprinkle with another handful of filling over it.

Repeat the same process with all but 3 of the remaining sheets of phyllo dough, which will be used to make the top crust. Make sure you add all of the filling! Fold the overhanging ends of the phyllo over and drizzle with butter. Add 2 of the 3 remaining sheets of phyllo folded in half, to fit nicely and exactly in the pan without any ends hanging over. Drizzle each one with butter. Spread the final sheet nicely over the top, covering the whole pan. Carefully use your brush to tuck it in all around the sides of the baklava, creating a nice top layer. Add all of the remaining butter over the top and you can now brush it over the phyllo dough.

Refrigerate for 20 minutes to chill. When ready, remove and score the top with a sharp knife, creating diamond shaped pieces. Do not score all the way down. Bake for 2-2 ½ hours until golden and super crunchy.

When the baklava is ready, remove from oven and immediately pour the cooled syrup over it. Set it aside to soak up all of the syrup and cool (overnight it will be best). When ready, cut into pieces and serve.

(scroll down for English)
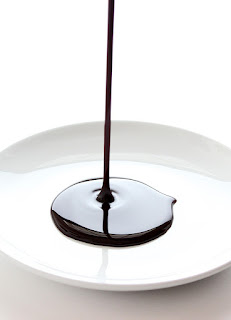
Καλοκαίρι = παγωτό. Για τον λόγο αυτό, σχεδόν κάθε ΣΚ προσπαθώ να εφοδιάσω την κατάψυξή μας με σπιτικό παγωτό σε διάφορες γεύσεις (πρέπει να δοκιμάσετε την συνταγή μου για παγωτό με 3 υλικά, χωρίς παγωτομηχανή). Μερικές φορές βέβαια αυτό δεν είναι αρκετό, καθώς τα αποθέματα τελειώνουν γρήγορα. Εκτός από ποικιλία σε γεύσεις μου αρέσει να έχω και διάφορα "συνοδευτικά" για το παγωτό όπως τρούφες και σιρόπια σε διάφορες γεύσεις. Τελευταία, αγαπάμε πολύ αυτή την σοκολατένια σως.
Είναι πλούσια σε γεύση, σοκολατένιο και κρεμώδες. Εκτός από το παγωτό, μπορείτε να το σερβίρετε με το κέικ ή ακόμα και ως dip για τα σοκολατένια μπισκότα σας.

ΖΕΣΤΗ ΣΩΣ ΣΟΚΟΛΑΤΑΣ
ΥΛΙΚΑ
1 κουτί ζαχαρούχο γάλα
60 γρ. βούτυρο
1/2 φλ. κομματάκια σοκολάτας
ΕΚΤΕΛΕΣΗ
Βάζετε όλα τα υλικά σε ένα κατσαρολάκι, σε χαμηλή φωτιά και ανακατεύετε μέχρι να ομογενοποιηθούν και να "δέσει" η σως. Αποσύρετε από τη φωτιά και αφήνετε στην άκρη να κρυώσει εντελώς. Στην συνέχεια μεταφέρετε σε βάζο και τη διατηρείτε στο ψυγείο.
Για το σερβίρισμα, απλά βάλτε την επιθυμητή ποσότητα σε ένα μπολ και ζεστάνετε στο φούρνο μικροκυμάτων.
Δοκιμάστε επίσης


Summer = ice cream. Almost every weekend I'm trying to reload our freezer with homemade ice cream in various flavors (you have to try my 3 ingredient ice cream recipe) but sometimes it doesn't seem enough. Besides the variety in flavors I like to offer and some homemade toppings too and this Hot Fudge sauce is one of my favorites.
It is rich, chocolaty and creamy. It can be used as ice cream topping, served warm over pound cake or even as a dip for chocolate chip cookies.

HOT FUDGE SAUCE
INGREDIENTS
1 can sweetened condensed milk
60 gr. butter
1/2 cup chocolate chips
DIRECTIONS
Add all ingredients to a saucepan and cook over low heat until sauce is smooth and creamy. Let cool slightly and spoon into a jar.
Store in fridge. To serve, just spoon the amount you want into a ball and microwave for some seconds, until it becomes hot again.
You might also like